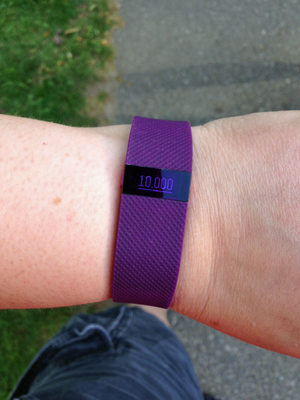
Getting love from my Fitbit ChargeHR upon reaching 10,000 steps
A few years back, I took part in a wellness competition that pitted co-worker against co-worker, trying to see who could get the most steps. People were organized in teams, and we were given these exceptionally junky (but free!) pedometers that we clipped onto ourselves as a way to measure our movement.
It totally stressed me out. I hated it.
Here’s the thing: as a new person at my company, and wanting to take advantage of my employer’s encouragement to be healthier, the competition gave me a great incentive to get up and move myself out of my cubicle. It also gave me a sense of belonging, even if only to commiserate with fellow pedometer-wearing folk who similarly hated the clunky, clearly-worth-the-free-price devices. I bowed out after doing a couple of these competitions in a row; I couldn’t handle the stress of keeping up with co-workers who had A LOT more time to work out every day, and I truly HATED wearing the pedometer. I could never seem to find a place to wear the device where it would measure my steps accurately on a consistent basis, and woe unto me if I forgot to put the thing on, since we had to log our steps daily.
But the thing is, I still wanted to be healthier, and that’s been a constant struggle. Movement during the day can be really difficult, especially when you work in an office environment where the majority of “active” time is when you’re going between floors or rooms for meetings.
Enter Fitbit.
I have friends with Fitbit devices, and I’ve seen them sported by several co-workers. They talked about how great it was to strap the thing on and not really think about it; their steps were just recorded for them. Feedback happened when you hit a step goal that YOU set, and the price wasn’t heinous.
After much hemming and hawing over which features were most important to me, I settled on the Fitbit Charge HR. I wanted it to count flights of stairs (to encourage me to skip the elevator), and I really liked that it had a wristband more like that of a watch. Facebook friends and page followers also told me that they’d had better luck with the Fitbit Charge HR
‘s wristband than that of the Fitbit Flex
(something about breaking?!), so that also pointed to the Fitbit Charge HR
.
So I got one. And I LURVE it.
I’ve had mine for about a month now, and it’s gotten me to MOVE more just by its being on my wrist. That doesn’t mean it buzzes at me when I’m sedentary for a stretch (which would be a nifty feature, btw); I mean that its very presence is a physical reminder that I’ve made a promise to myself to be healthier. Thus far, it has been working: I’m taking the stairs more at the office than before I got my Charge HR, and I’m more motivated to find ways to get to 10,000 steps for as many days as I can. That number is still not nearly as many days as I’d like but–baby steps. Without some kind of step counter I just didn’t have a good baseline for what a “normal” day in my life looked like anymore, and it’s impossible to measure progress without knowing your starting point.
It also helps that it’s easy to use. Setup instructions are minimal; you download the app to your phone and it walks you through everything (including getting an account set up on the Fitbit website). Once this is all set, the device synchronizes data wirelessly using Bluetooth, so the cumbersome data entry of those prior years’ competitions is never happening again. Even better, I get real-time feedback on the device and on the app.
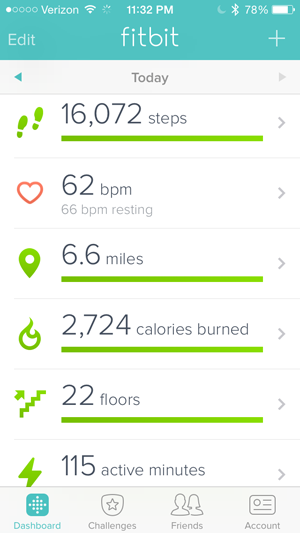
A recent Sunday, often my most active steps day
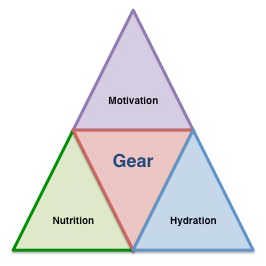
In general, I’ve found that the Fitbit Charge HR solves three problems for me:
- I can’t forget it – with a clock of its own, I wear my Fitbit instead of a watch.
- I don’t struggle finding a place to wear it – it goes on my wrist and stays securely there.
- I don’t have to fuss with logging steps – that’s done automatically by the device, which sends the info to the app (which then sends the info to the website).
One area of improvement for Fitbit would be a longer charging cable; it’s designed for charging with your computer, and I charge my devices with the wall instead. (This problem was easily solved by buying an inexpensive USB Extension Cable from Amazon).
The result of my Fitbit experiment: I’m making more progress in my weight loss.
So that’s really the big test, right? If you’re starting to see that you’re passing a plateau mark, that’s a good sign. In my case, the first inkling that I’d reached a turning point was when my clothes (particularly those for work) were hanging off me. The next point that it clicked for me was when I went to the doctor’s office for my physical and she told me that I’d lost 17lbs since my exam in 2014. Sure, a good bit of that was done pre-Fitbit-purchase, but I’d plateau’ed a couple of months ago and needed help getting my weight loss going again.
I won’t say that a Charge HR can do this for everyone. Honestly, if the motivation isn’t there, there’s no amount of wearable tech that’s going to make it happen. And I’m not losing crazy amounts of weight where I’m dropping a dress size a week or something. The Fitbit is just helping me keep track of where I was and giving my wrist a gentle hug when I make my daily goal.
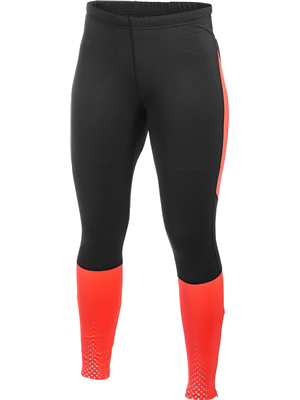
My tight shorts aren’t so tight anymore.
In the past month, I’ve dropped an inch or two from my waist, to the point where my “tight waist” shorts now barely hug my hips. I’ve lost 3.5lbs, about one pound per week (which is a totally healthy amount to lose per week). All in all, it’s pretty incredible.
I can’t wait to see what the next month brings.