I’ve put a lot of hours into my nails over the last year or so, trying to find ways to have fun expressions of art with me all the time without resorting to more tattoos. (DH is highly amused by my nail art but gives me the side-eye every time I discuss getting another tattoo.) For those who follow me on Facebook or Twitter, you see these posts roughly once a week, as I debut whatever new concoction I’ve designed, from the simple…

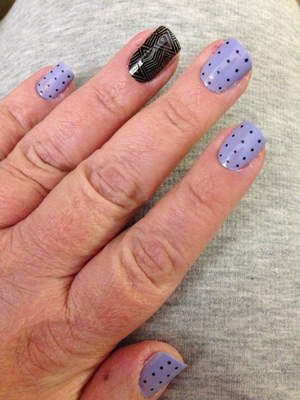
(simple multi-colored polka dots on silver polish)
…to the more ornate…
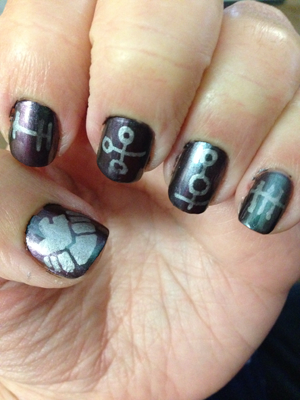
(inspired by Marvel’s Agents of SHIELD)
…to the event-specific…
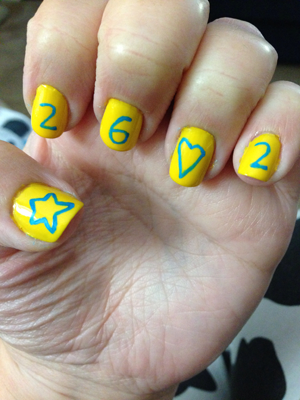
(celebrating earning Star Pacesetter status for the 2014 Boston Marathon Jimmy Fund Walk)
…to the downright silly:
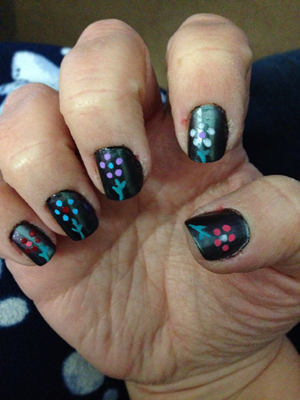
(adding flowers to my nails to cheer me up while under all this awful snow)
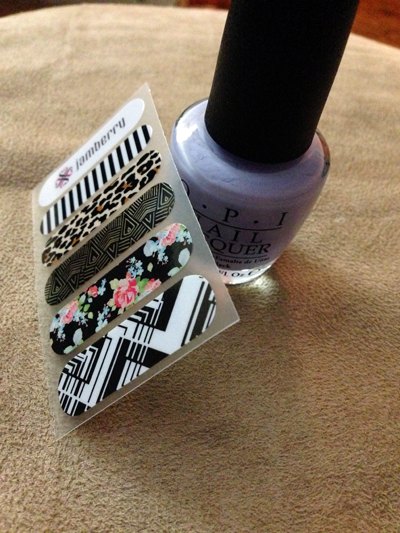
A fairly strong devotee to specific products, I was curious about a “7-day challenge” posed by a friend who sells Jamberry nail wraps: try one “accent” Jamberry nail wrap for a week, with regular polish on the other nails, and see how they stack up. My friend sent me a set of samples, and away I went!
I pitted the Jamberry “Sheer Genius” accent against a lovely OPI color that I’ve used several times before (“You’re Such a Budapest”), resulting in the following:
Spot the Jamberry!
My typical home manicure involves one coat of Seche Clear, two coats of OPI polish, and one coat of Seche Vite
. If I’m doing nail art, I put on a second coat of Seche Vite afterwards. That typically keeps my nails in good shape for about 5-7 days, at a lower cost than if I went to a nail salon. Of course, there’s the downside of needing to have an entire drawerful of polishes in order to give me variety, and there will be the once-in-a-while “Oops, I accidentally dropped the hot pink nail polish on the carpet and THAT’S not coming out anytime soon” event, but all in all, it’s me time to chill out and do something creative.
I don’t typically need a lot of tools; I have a nail trimmer, a file, and a buffer. Jamberry, however, requires a whole suite of tools: tweezers, scissors, a cuticle pusher (potentially also a spoon pusher), alcohol wipes, and some form of heat applicator to set the adhesive. I’ve seen YouTube videos instructing on the use of a heated rice bag, and I myself used a heating pad set on HIGH, but the recommended method is either a hair dryer or one of the official Jamberry mini-heaters. In other words, there’s more investment required, but–with the exception of the alcohol wipes–these are tools that you can use for long stretches of time, if not forever.
So, how did it go?
After six days, I finally had a crack on the OPI polish–while the Jamberry still looked the same. In other words, Jamberry wins the 7-day challenge *by a nose*. Ultimately I’m the winner, since now I have a better understanding of how the two options stack up against each other.
Here’s the breakdown on other considerations, though, especially if you don’t mind changing your nail designs weekly:
Value Relative to Cost
Comparing the two options, the polish comes out ahead just on product alone:
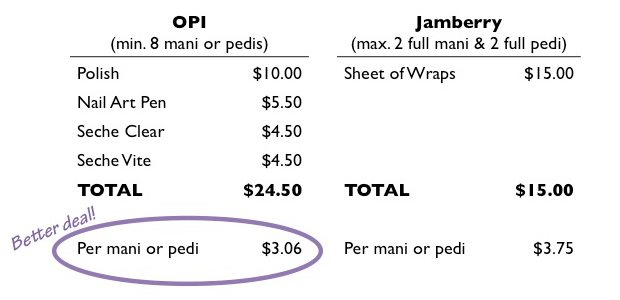
In both cases, note that I’m just talking about the product used to apply the design to the nail, not the additional accessories (pushers, buffers, files, scissors, heaters, etc.). With far more required tools, Jamberry runs a higher overall cost–assuming the mani or pedi lasts roughly the same amount of time. Jamicures, as they prefer to call them, are supposed to last from 7-14 days (comparable to a gel or shellac, minus the chemicals and UV rays), but my Jamicure lasted for 7 days before it started to peel and come apart, so your mileage (as always) may vary.
Designs
OPI doesn’t come with ready-made designs in a bottle, so you are the artist. For those who don’t feel their hands are steady enough (or who don’t want the added expense of multiple nail art pens), Jamberry provides a more straightforward way to apply nail art of all complexity levels. There are, of course, other options–nail art stickers, glue-on gems, etc.–but I typically stick with 2-dimensional artwork, so I can’t comment on the pricing or degrees of difficulty. Jamberry nail wraps come in dozens of styles and the custom wraps option makes the variety nearly limitless. I say “nearly” because Jamberry won’t violate licensing agreements, so things “inspired by” licensed items (like superheros) may be okay, but using licensed imagery without an agreement in place is NOT.
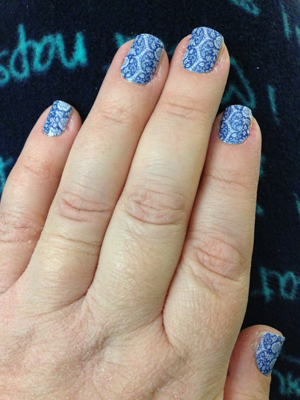
My first “jamicure” – Jamberry “Porcelain” nail wraps
Ease of Application
Nail polish, in general, is pretty darn easy to apply. Jamberry is not too terribly difficult to apply, but the requirement for heat is a bit annoying. Unless you’re totally unplugged, using a pre-heated rice bag (which you had to heat in a microwave in the first place!), you’ll need electricity nearby. For me, doing my nails after the kids go to bed, the heating pad was the only noise-free heating option I had readily available. Jamberry, once applied, can be a real pain to adjust; place them properly the first time, since any moves tend to cause you more heartache than they’re worth. Of course, who hasn’t accidentally touched something with a wet nail and messed it up? Jamberry nail wraps are ready to go as soon as they’ve cooled, so there’s no real “drying time”; however, the sheer volume of stuff needed to apply them really lowers the whole “ease” rating, in my mind. In this category, I’d give a slight edge to OPI.
“That chemical smell”
There are no two ways around it: polish smells awful. My long-suffering DH puts up with it, but we both agree that the smell of polish can be pretty awful at times. Jamberry nail wraps have no smell associated with them, so they’re definitely great for keeping your house from smelling like a nail salon.
Summary: Each option has pluses and minuses, and it’s up to the individual to decide which works better for them for a given occasion. I will continue to use both (though probably not with each other), and I’ll tend not to use the Jamberry nail wraps in successive weeks. Using nail polish week after week strengthens my nails, so I’d lose out on that if I use Jamberry wraps week in, week out. Jamberry has the benefit of offering art patterns that I simply can’t do on my own, so I consider them my utility player for fancier nails. Choose what works for you, but know that there are different options–of varying degrees of cost and difficulty–that can be less expensive than the salon and have just as attractive results.

Seche vite and top coat and base coat are way over $4.50 retail. Normally it’s about $9.99 for each at including Ulta, Sally’s, and Sephora. So the breakdown price comparison between doing your own traditional mani/pedi vs. using Jamberry nail wraps is very off. As a consumer alone I do both types and love Seche Vite. Just thought I’d throw that out there.
I usually get a deal at Sally’s (BOGO or GWP), but the price I quoted was what you could pay via the Amazon link I provided (at that time). I don’t even know when I last paid full retail for Seche products! Glad I found another Seche devotee; their products are fab.