Gaining a Fitbit has me losing (weight)

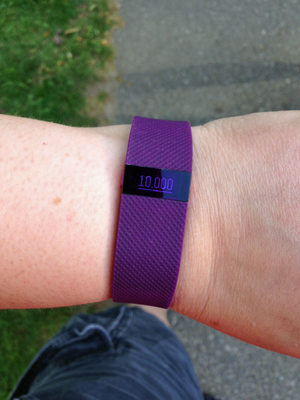
Getting love from my Fitbit ChargeHR upon reaching 10,000 steps

Getting love from my Fitbit ChargeHR upon reaching 10,000 steps

A few years back, I took part in a wellness competition that pitted co-worker against co-worker, trying to see who could get the most steps. People were organized in teams, and we were given these exceptionally junky (but free!) pedometers that we clipped onto ourselves as a way to measure our movement.

It totally stressed me out. I hated it.

Here’s the thing: as a new person at my company, and wanting to take advantage of my employer’s encouragement to be healthier, the competition gave me a great incentive to get up and move myself out of my cubicle. It also gave me a sense of belonging, even if only to commiserate with fellow pedometer-wearing folk who similarly hated the clunky, clearly-worth-the-free-price devices. I bowed out after doing a couple of these competitions in a row; I couldn’t handle the stress of keeping up with co-workers who had A LOT more time to work out every day, and I truly HATED wearing the pedometer. I could never seem to find a place to wear the device where it would measure my steps accurately on a consistent basis, and woe unto me if I forgot to put the thing on, since we had to log our steps daily.

But the thing is, I still wanted to be healthier, and that’s been a constant struggle. Movement during the day can be really difficult, especially when you work in an office environment where the majority of “active” time is when you’re going between floors or rooms for meetings.

Enter Fitbit.

I have friends with Fitbit devices, and I’ve seen them sported by several co-workers. They talked about how great it was to strap the thing on and not really think about it; their steps were just recorded for them. Feedback happened when you hit a step goal that YOU set, and the price wasn’t heinous.

After much hemming and hawing over which features were most important to me, I settled on the Fitbit Charge HR. I wanted it to count flights of stairs (to encourage me to skip the elevator), and I really liked that it had a wristband more like that of a watch. Facebook friends and page followers also told me that they’d had better luck with the Fitbit Charge HR‘s wristband than that of the Fitbit Flex (something about breaking?!), so that also pointed to the Fitbit Charge HR.

So I got one. And I LURVE it.

I’ve had mine for about a month now, and it’s gotten me to MOVE more just by its being on my wrist. That doesn’t mean it buzzes at me when I’m sedentary for a stretch (which would be a nifty feature, btw); I mean that its very presence is a physical reminder that I’ve made a promise to myself to be healthier. Thus far, it has been working: I’m taking the stairs more at the office than before I got my Charge HR, and I’m more motivated to find ways to get to 10,000 steps for as many days as I can. That number is still not nearly as many days as I’d like but–baby steps. Without some kind of step counter I just didn’t have a good baseline for what a “normal” day in my life looked like anymore, and it’s impossible to measure progress without knowing your starting point.

It also helps that it’s easy to use. Setup instructions are minimal; you download the app to your phone and it walks you through everything (including getting an account set up on the Fitbit website). Once this is all set, the device synchronizes data wirelessly using Bluetooth, so the cumbersome data entry of those prior years’ competitions is never happening again. Even better, I get real-time feedback on the device and on the app.
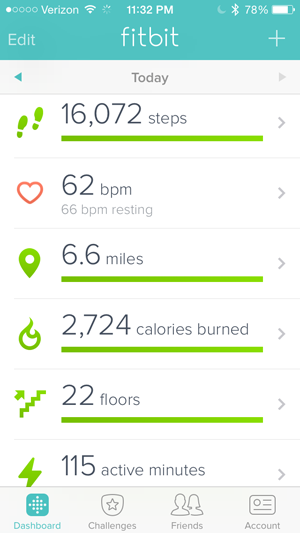
 

A recent Sunday, often my most active steps day

A recent Sunday, often my most active steps day

In general, I’ve found that the Fitbit Charge HR solves three problems for me:

  1. I can’t forget it – with a clock of its own, I wear my Fitbit instead of a watch.
  2. I don’t struggle finding a place to wear it – it goes on my wrist and stays securely there.
  3. I don’t have to fuss with logging steps – that’s done automatically by the device, which sends the info to the app (which then sends the info to the website).

One area of improvement for Fitbit would be a longer charging cable; it’s designed for charging with your computer, and I charge my devices with the wall instead. (This problem was easily solved by buying an inexpensive USB Extension Cable from Amazon).

The result of my Fitbit experiment: I’m making more progress in my weight loss.

So that’s really the big test, right? If you’re starting to see that you’re passing a plateau mark, that’s a good sign. In my case, the first inkling that I’d reached a turning point was when my clothes (particularly those for work) were hanging off me. The next point that it clicked for me was when I went to the doctor’s office for my physical and she told me that I’d lost 17lbs since my exam in 2014. Sure, a good bit of that was done pre-Fitbit-purchase, but I’d plateau’ed a couple of months ago and needed help getting my weight loss going again.

I won’t say that a Charge HR can do this for everyone. Honestly, if the motivation isn’t there, there’s no amount of wearable tech that’s going to make it happen. And I’m not losing crazy amounts of weight where I’m dropping a dress size a week or something. The Fitbit is just helping me keep track of where I was and giving my wrist a gentle hug when I make my daily goal.
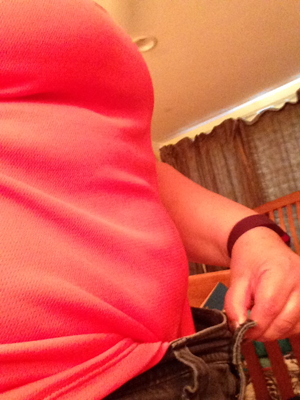
My tight shorts aren't so tight anymore.

My tight shorts aren’t so tight anymore.


In the past month, I’ve dropped an inch or two from my waist, to the point where my “tight waist” shorts now barely hug my hips. I’ve lost 3.5lbs, about one pound per week (which is a totally healthy amount to lose per week). All in all, it’s pretty incredible.

I can’t wait to see what the next month brings.


Product Review: Light Step Calf Compression Sleeves

{Disclaimers: 1) I am not, not do I claim to be a doctor. Before you attempt to use this product, check with your primary care physician and/or specialist health care professional to be sure that it’s right for you. 2) I received this product for the purpose of testing and was allowed to keep it as a courtesy for posting a review. I received no other compensation for this review. In other words: this is MY opinion and not a company-paid PR piece. Take that for what you will.}


Light Step Calf Compression Sleeves

If you’d asked me a year ago whether I wanted calf sleeves, I’d probably have given you more than a little side-eye. It wasn’t until my triathlete dh started showing off his calf sleeves that I learned of their value for workouts. Prior to that, my sole exposure to these was knowing them as “compression stockings” (or similarly named items), worn by patients with lymph edema on their lower extremities.

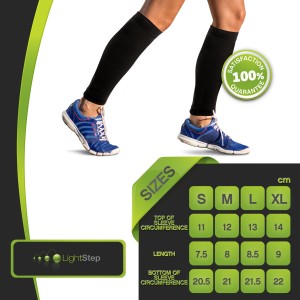
DH wears high-quality calf sleeves during his workouts, so when I was approached with the opportunity to review Light Step Calf Compression Sleeves, I was curious about trying them out for myself. I will say that the product information on the Amazon product page is somewhat lacking for textual information, so it’s vital to review the pictures, including this one, with a size chart:


Light Step Calf Compression Sleeves Size Chart


Unfortunately, the size chart didn’t start things off on the right foot; what I consider “top of sleeve” would be the highest point of my calf (or, alternately, the girth, which other manufacturers use as a key measurement). Also, the sizes listed can’t possibly be in centimeters, else there’s no way I could’ve fit even the XL sleeve on my women’s size 14 calf. Things didn’t improve dramatically when my sleeves showed up with no packaging other than a plastic bag marked with an “XL” sticker. (I can only hope that this was due to my getting these for a review; if this is how they send out products purchased by customers, that’s not a good thing.)


The tests:

I took my calf compression sleeves out for two different workouts–a 5K walk inside on the treadmill at the gym and just under 5K outside on a cold Sunday morning. They were also washed in between the workouts.


The results:

Both workouts went well enough. In the gym-based workout, I wore them with the same climbing capris that I used for last year’s marathon walk, and I was able to keep a nice clip going on the treadmill without my shins kicking up any measure of fuss about my speed. I didn’t overheat, and the sleeves stayed put without feeling like I was having my blood supply cut off. For my outdoor walk, in 30-35ºF, I put them on under thinly-lined track pants, since the temperature at the end of a walk typically feels about 10ºF warmer than the actual air temperature. My thighs were slightly chilly as I set out, but this wasn’t the case at all for my calves–they were a perfect temperature and, again, very comfortable without any concern of feeling too constricted.

Unable to find any information on proper washing instructions, I hand-washed them on a day in between the two workouts. They felt exactly the same after air-drying as they did when they first arrived (no pilling, no snagging, and no easily detectable degradation of elastic quality).


Light Step Calf Compression Sleeves

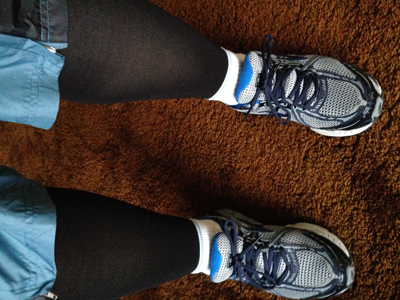
The Light Step Calf Compression Sleeves, with my track pants pulled up to show how they fit as “cold weather” gear


The Light Step Calf Compression Sleeves look and fit much like a footless women’s knee-high stocking, in tights-level weight, and I found them generally comfortable to wear before, during, and post-workout. The trouble is, without knowing that I was wearing the right size (thanks to the screwball size chart), and not knowing that I was applying them properly (due to the lack of ribbing, markings, or any other indication that definitively shows which way should face front), it’s hard for me to know that I was using them properly. That’s more than a little bit disconcerting.

The price point is considerably lower than that of most calf compression sleeves ($19.99 versus the $50.00 or so that I’m used to seeing), but other manufacturers’ sleeves–including the ones dh and his fellow triathletes purchase–have packaging, ribbing, markings, and various other indications designed to increase the likelihood of correct use. The Light Step sleeves are also marketed for general use, from fitness to therapeutic needs, which suggests they’re designed for no specific application.

It’s hard for me to recommend the Light Step Calf Compression Sleeves; it’s unclear to me that they did much to help my performance and they seem designed as a generic alternative calf sleeve. Perhaps a future revision of the product and packaging will move the Light Step Calf Compression Sleeves forward, but for now they leave me with the impression that these sleeves aren’t yet ready to go the distance.


Where to buy:

Light Step Calf Compression Sleeves are exclusively sold through Amazon.com. As Light Step does not yet appear to have a formal website of their own, you can connect directly with Light Step through their Facebook page.

Jamberry vs OPI: Putting pretty nail options to the test

Jamberry vs OPI Challenge

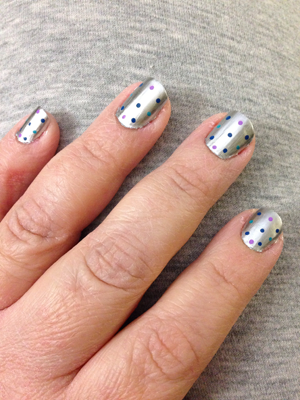
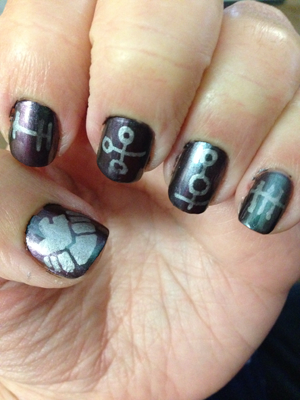
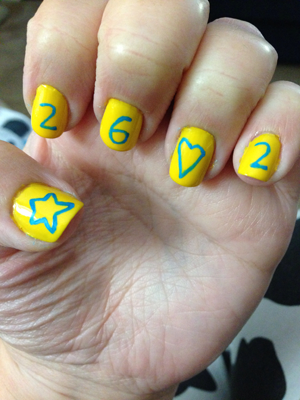
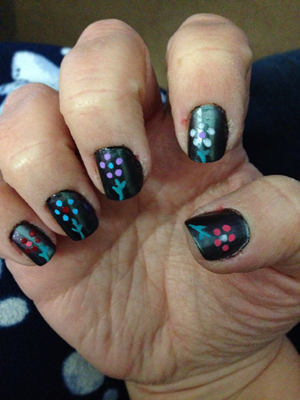
I’ve put a lot of hours into my nails over the last year or so, trying to find ways to have fun expressions of art with me all the time without resorting to more tattoos. (DH is highly amused by my nail art but gives me the side-eye every time I discuss getting another tattoo.) For those who follow me on Facebook or Twitter, you see these posts roughly once a week, as I debut whatever new concoction I’ve designed, from the simple…

Silver nail polish with multi-colored polkadots

(simple multi-colored polka dots on silver polish)

…to the more ornate…

Marvel's Agents of SHIELD-inspired nails

(inspired by Marvel’s Agents of SHIELD)

…to the event-specific…

Nails celebrating being a Star Pacesetter for the 2014 Boston Marathon Jimmy Fund Walk

(celebrating earning Star Pacesetter status for the 2014 Boston Marathon Jimmy Fund Walk)

…to the downright silly:

Flower nail art

(adding flowers to my nails to cheer me up while under all this awful snow)

A fairly strong devotee to specific products, I was curious about a “7-day challenge” posed by a friend who sells Jamberry nail wraps: try one “accent” Jamberry nail wrap for a week, with regular polish on the other nails, and see how they stack up. My friend sent me a set of samples, and away I went!

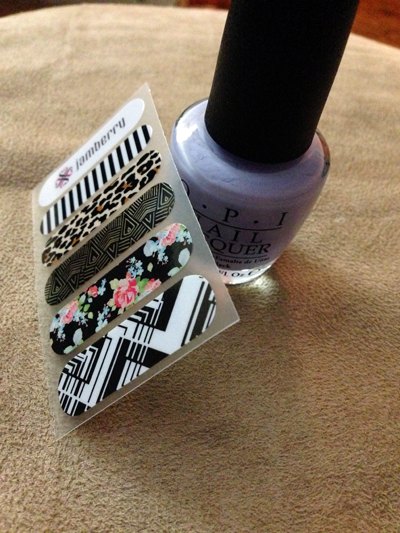
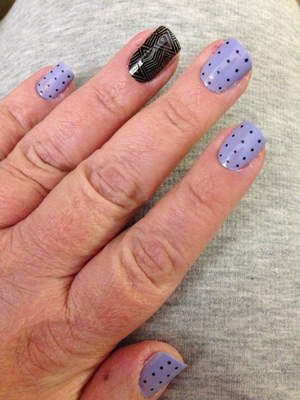
I pitted the Jamberry “Sheer Genius” accent against a lovely OPI color that I’ve used several times before (“You’re Such a Budapest”), resulting in the following:

Jamberry vs OPI's "You're Such a Budapest"

Spot the Jamberry!

My typical home manicure involves one coat of Seche Clear, two coats of OPI polish, and one coat of Seche Vite. If I’m doing nail art, I put on a second coat of Seche Vite afterwards. That typically keeps my nails in good shape for about 5-7 days, at a lower cost than if I went to a nail salon. Of course, there’s the downside of needing to have an entire drawerful of polishes in order to give me variety, and there will be the once-in-a-while “Oops, I accidentally dropped the hot pink nail polish on the carpet and THAT’S not coming out anytime soon” event, but all in all, it’s me time to chill out and do something creative.

I don’t typically need a lot of tools; I have a nail trimmer, a file, and a buffer. Jamberry, however, requires a whole suite of tools: tweezers, scissors, a cuticle pusher (potentially also a spoon pusher), alcohol wipes, and some form of heat applicator to set the adhesive. I’ve seen YouTube videos instructing on the use of a heated rice bag, and I myself used a heating pad set on HIGH, but the recommended method is either a hair dryer or one of the official Jamberry mini-heaters. In other words, there’s more investment required, but–with the exception of the alcohol wipes–these are tools that you can use for long stretches of time, if not forever.

So, how did it go?

After six days, I finally had a crack on the OPI polish–while the Jamberry still looked the same. In other words, Jamberry wins the 7-day challenge *by a nose*. Ultimately I’m the winner, since now I have a better understanding of how the two options stack up against each other.

Here’s the breakdown on other considerations, though, especially if you don’t mind changing your nail designs weekly:

Value Relative to Cost
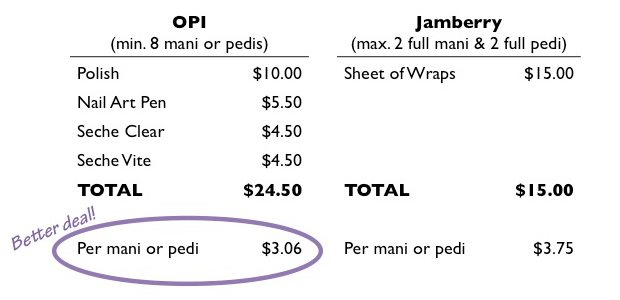
Comparing the two options, the polish comes out ahead just on product alone:

Cost comparison of OPI + Seche products vs Jamberry nail wraps

In both cases, note that I’m just talking about the product used to apply the design to the nail, not the additional accessories (pushers, buffers, files, scissors, heaters, etc.). With far more required tools, Jamberry runs a higher overall cost–assuming the mani or pedi lasts roughly the same amount of time. Jamicures, as they prefer to call them, are supposed to last from 7-14 days (comparable to a gel or shellac, minus the chemicals and UV rays), but my Jamicure lasted for 7 days before it started to peel and come apart, so your mileage (as always) may vary.

Designs
OPI doesn’t come with ready-made designs in a bottle, so you are the artist. For those who don’t feel their hands are steady enough (or who don’t want the added expense of multiple nail art pens), Jamberry provides a more straightforward way to apply nail art of all complexity levels. There are, of course, other options–nail art stickers, glue-on gems, etc.–but I typically stick with 2-dimensional artwork, so I can’t comment on the pricing or degrees of difficulty. Jamberry nail wraps come in dozens of styles and the custom wraps option makes the variety nearly limitless. I say “nearly” because Jamberry won’t violate licensing agreements, so things “inspired by” licensed items (like superheros) may be okay, but using licensed imagery without an agreement in place is NOT.

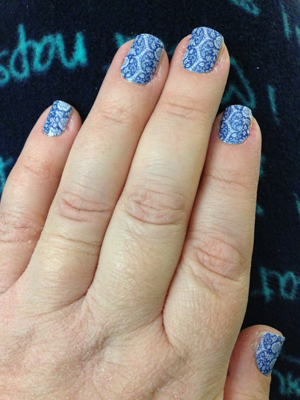
Jamberry "Porcelain" jamicure

My first “jamicure” – Jamberry “Porcelain” nail wraps

Ease of Application
Nail polish, in general, is pretty darn easy to apply. Jamberry is not too terribly difficult to apply, but the requirement for heat is a bit annoying. Unless you’re totally unplugged, using a pre-heated rice bag (which you had to heat in a microwave in the first place!), you’ll need electricity nearby. For me, doing my nails after the kids go to bed, the heating pad was the only noise-free heating option I had readily available. Jamberry, once applied, can be a real pain to adjust; place them properly the first time, since any moves tend to cause you more heartache than they’re worth. Of course, who hasn’t accidentally touched something with a wet nail and messed it up? Jamberry nail wraps are ready to go as soon as they’ve cooled, so there’s no real “drying time”; however, the sheer volume of stuff needed to apply them really lowers the whole “ease” rating, in my mind. In this category, I’d give a slight edge to OPI.

“That chemical smell”
There are no two ways around it: polish smells awful. My long-suffering DH puts up with it, but we both agree that the smell of polish can be pretty awful at times. Jamberry nail wraps have no smell associated with them, so they’re definitely great for keeping your house from smelling like a nail salon.


Summary: Each option has pluses and minuses, and it’s up to the individual to decide which works better for them for a given occasion. I will continue to use both (though probably not with each other), and I’ll tend not to use the Jamberry nail wraps in successive weeks. Using nail polish week after week strengthens my nails, so I’d lose out on that if I use Jamberry wraps week in, week out. Jamberry has the benefit of offering art patterns that I simply can’t do on my own, so I consider them my utility player for fancier nails. Choose what works for you, but know that there are different options–of varying degrees of cost and difficulty–that can be less expensive than the salon and have just as attractive results.